Dec 15, 2021 - The Collect setup tool has been deprecated and is no longer supported as Collect has been replaced by Aquatic Compliance & Operations.
| Claros Collect Setup automates the Plant Setup for Claros Collect from the chosen WIMS variables. Variables are added to Claros Collect from the variable browser, Monthly Data Entry Forms, or Custom Data Forms. The setup tool will guess at the Process Type, Location and Parameter based on the variable location and variable. You can then choose or override any of the settings to create the Process/Location/Parameters in Claros Collect and setup the variable interface cross reference. |
 |
You will first be prompted for your Claros Collect credentials (username/password):

Claros URL - Should be set to https://ffaa-us.fsn.hach.com and should not be changed. Click Set to Default to reset to https://ffaa-us.fsn.hach.com.
Claros UserName - The user name you use when you log into Claros Collect at https://fcwb-us.fsn.hach.com
Claros Password - Your Claors Collect password.
Proxy Server IP:Port - Typically NOT required. If you use a Internet Proxy server enter in the IP:Port Number of your proxy server (i.e. 192.168.1.211:8080) The address of a proxy server is similar to that of any computer on the network, and it could be something like: 192.168.1.211. The port can be any combination of up to four figures. It can be any combination of digits, including 80 or 8080, depending on how its administrator(s) set it. The IP address and port of your company’s proxy server are given to you by the network administrator or by the company’s IT department. To check if you are using a proxy server in Windows 10: Search Proxy Settings and in the Manual Proxy Settings see if the Address and Port fields are set. Note: Proxy Settings are saved to OPSROOT.GENERALSETTINGS so the next time you use the Setup Tool it will be defaulted for you.
Use Identity Server 4 for Authentication - When checked a more secure Authentication Method will be used for connecting to Claros Collect. The old method will eventually be deprecated.
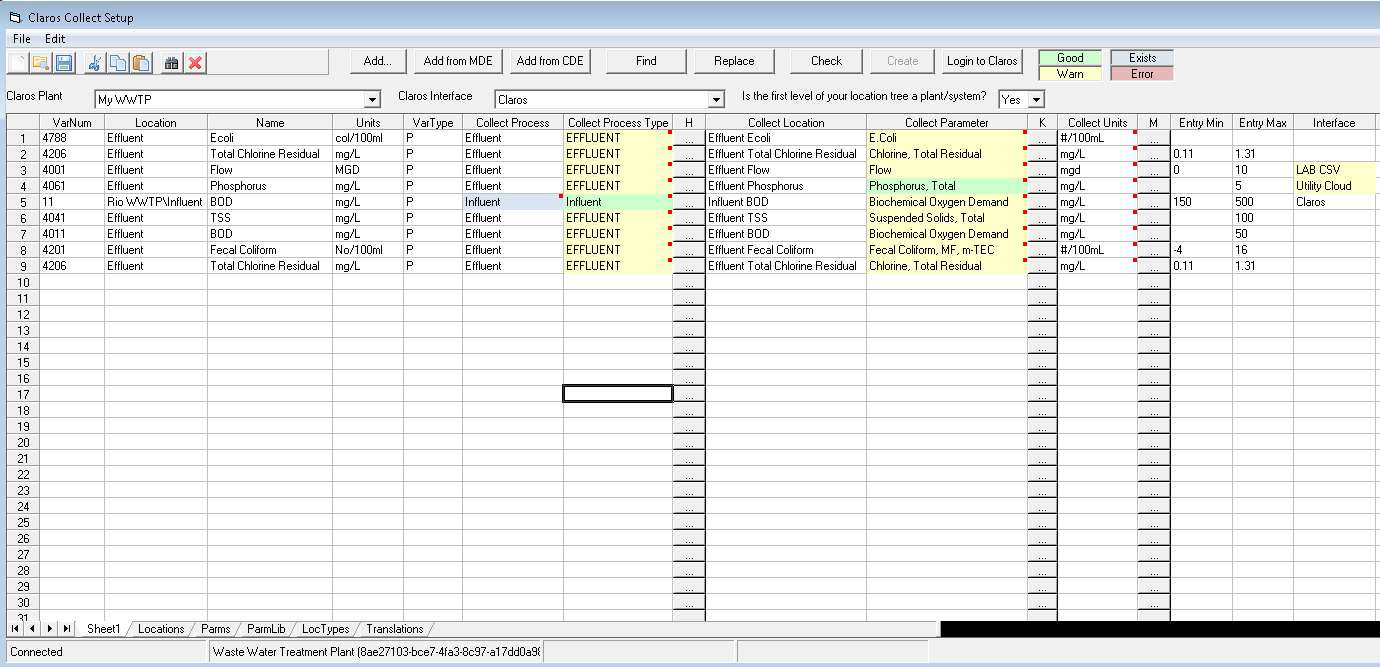
Once you have logged in the Setup form will be displayed.
Steps to configure Claros Collect Plant Setup:
- Verify you have installed and configured your Claros Collect Interface. This allows the setup tool to configure the WIMS variable cross references properly. Go to http://www.opssys.com/InstantKB/article.aspx?id=12932 to download and install then Q14412 Claros Collect Interface.
- Create the Plant/System in Claros Collect Plant Setup that you want to populate. NOTE: The Plant must be setup before the setup tool can add processes/locations/parameters.
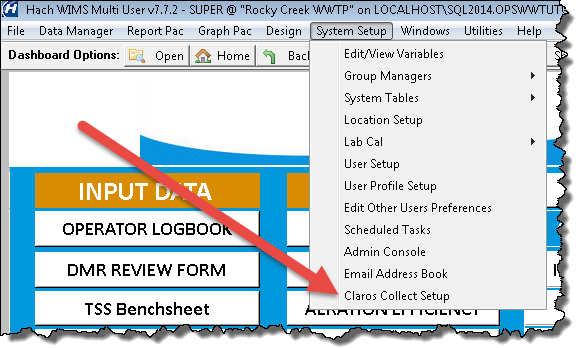
- From the main menu, choose System Setup>Claros Collect Setup.
- You will first be prompted to Login to your Claros Collect account. Enter your Claros username and password and click Log In. This will load any existing Plants/Systems, Processes, Locations, and Parameters you have already setup in Claros Collect. Additional, it will load the latest version of process,parameter and unit libraries.
- Select the Claros Plant/System to setup.
- Use Add, Add From MDE (i.e. add variables from a MDE form), or Add from CDE (custom data entry form) to add variables into the list.
- As variables are selected, the setup tool will set the process and location based on the WIMS Location. It will then guess the Collect Process Type, Collect Parameter and Collect Units.
Background color is set to help you review the guess the tool has made.
A yellow background warns you that WIMS guessed the Claros Parameter and it should be reviewed. For example, the WIMS variable name is BOD so the tool guessed that that is the Biochemical Oxygen Demand Collect Parameter.
A Green Background means you have used the ... button to select the Process Type, Parameter or Units. NOTE: Process Type may be green if the Process name exactly matches a Collect Process type (i.e. Influent Process must be the Influent Process type).
Blue background means the item (Process or Parameter) already exists in Claros. Example, the Influent Process already exists in the chosen Claros Plant. It is OK if the process exists as additional locations/parameters can be added to an existing Process with the tool.
Red background means you have entered an invalid value for the Process Type, Parameter or Units. Those fields (columns) must be set to a valid value from the Claros library - click ... button to choose from the library.
- Click the Check button. Check MUST be performed before setup tool can create location/parameters. This will do a final QC check verifying:
- For each variable added all required fields are filled out.
- No duplicate Location parameters will be created. Example, you cannot have two (2) Flow parameters in a single location.
- That a Claros Interface is setup.
- A Claros Plant is selected.
- Click Create. The tool will add the process/locations/parameters/limits to the Claros Plant Setup.
Is the first level of your location tree a plant/system? This sets whether the first level or your location tree is used in the process name. Examples:
| WIMS Location |
Variable Name |
1st Level Plant? is checked |
1st Level Plant? is not checked |
| Rio WWTP\Influent |
Flow |
Process = Influent
Location = Influent Flow
Parameter = Flow |
Process = Rio WWTP
Location = Influent Flow
Parameter = Flow |
| Rio WWTP\Secondary Treatment\Aeration Basin |
MLSS |
Process = Secondary Treatment
Location = Aeration Basin MLSS
Parameter = Mixed Liquor Suspended Solids |
Process = Rio WWTP\Secondary Treatment
Location = Aeration Basin MLSS
Parameter = Mixed Liquor Suspended Solids |
| Effluent |
pH |
Process = Effluent
Location = Effluent pH
Parameter = pH |
Process = Effluent
Location = Effluent pH
Parameter = pH |
|
|
|
|