This article applies to Hach WIMS interfaces that read text (ASCII standard) files. The symptom is that the interface can import data if the files are on the local machine, but cannot read the files from a shared drive - even when trying to import data manually.
NOTE: If the interface can import data manually and not from the NT Service, first try setting the NT Service properties to use a different login instead of Local System account.
One solution to this problem, is to move the files to the local drive. Microsoft has a free download called "RoboCopy" that is packaged in Windows Resource Kits.
Download the Windows Resource Kit from:
http://www.microsoft.com/download/en/details.aspx?id=17657
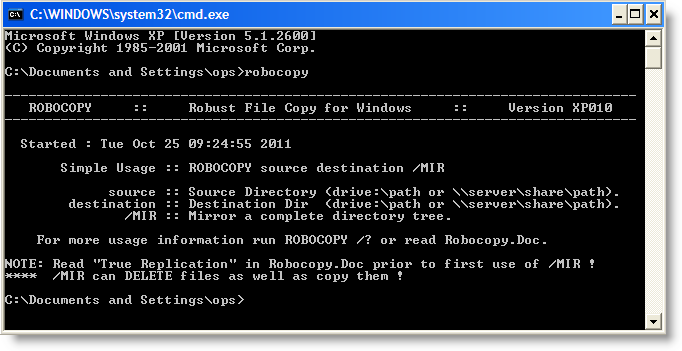
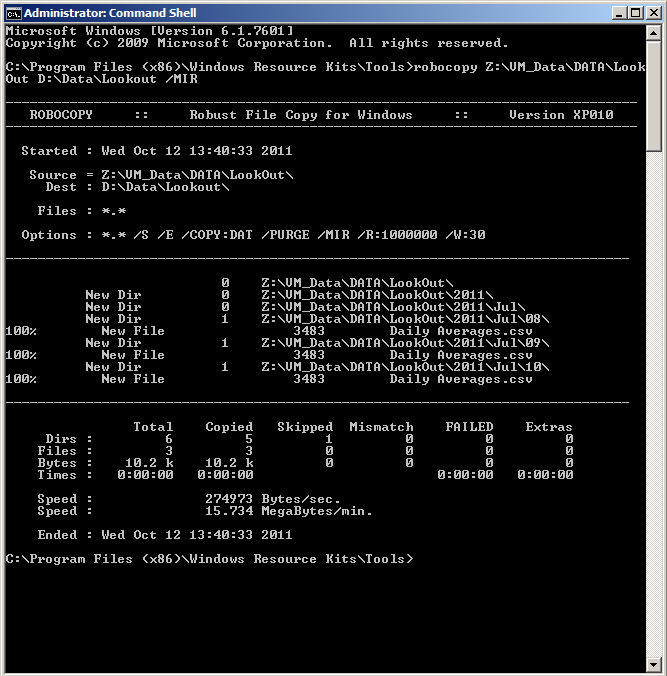
Once downloaded and installed, open a command prompt window (Run CMD). Type robocopy and you will see something like:
Some Window versions have compatibility issue warnings, but we have not seen any problems as of the writting of this article. We have tried this on Windows XP, Windows 7, and Windows 2008.
THE QUICK AND THE DIRTY:
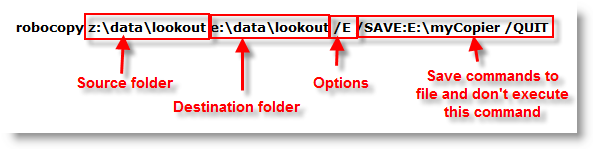
First create the command in a command prompt window to copy files, for example:
robocopy z:\data\lookout e:\data\lookout /E
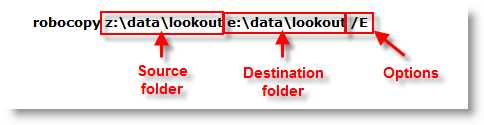
Add any options you desire, see the ROBOCOPY.DOC that was installed with the Microsoft product.
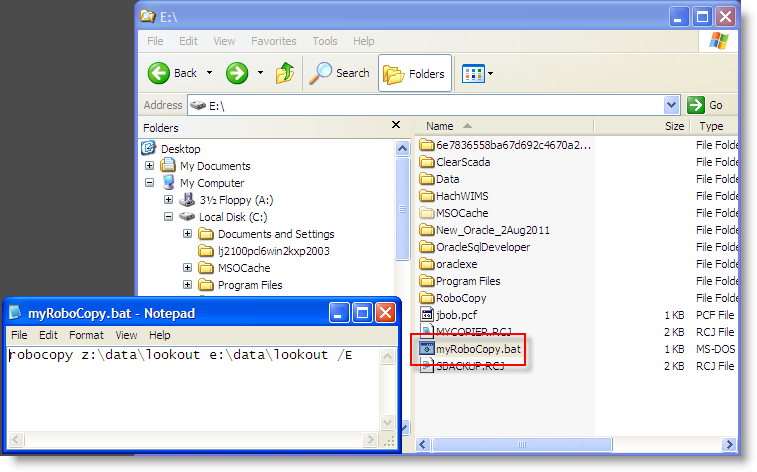
Create a text file with .BAT, our example we used: myRoboCopy.BAT. Enter the command used to copy files in the previous step and save the file:
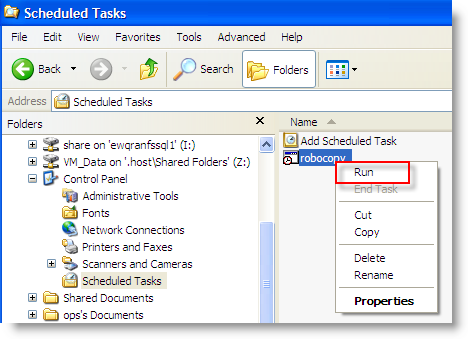
Finally, create a scheduled task that will run the batch file; in our example myRoboCopy.BAT file.
You can test the scheduled task by right clicking on the scheduled task and selecting Run option:

MORE DETAILS AND OTHER OPTIONS:
The basic command is: 'ROBOCOPY source destination [file [file]...] [options]' where source and destination are folders that locate the source and the destination for the data files. The [file] is the specific files to copy including wild cards, for example *.csv would copy all files that ended in .csv and not anything else. The [options] are directions for RoboCopy when copying files, see RoboCopy.doc, that was included in the installation, for more details.
To copy directory structures, add the option to the command line: /E which copies all subdirectories. Another command to use is /MIR which stands for 'mirror' a directory structure, in other words any folder that does not exists in source will be deleted from destination.
There are many other options that can be explored in the RoboCopy.doc that comes with the tool kit.
If you wish to use several options, you can save the long command line by adding '/SAVE:filename /QUIT' to the end of the command line. This will create a file of all your commands that you can edit later. When you want to run all the commands, simply run: 'robocopy /JOB:filename /QUIT' and this will attempt to execute all the commands in your file.
A simple command for use with Hach WIMS Interfaces:
RoboCopy z:\data_folder c:\data
Where 'z' is the shared drive, 'data_folder' is the root folder of the data, 'c' is the local drive, and 'data' is the destination folder.
Here is an example we used:
We ran the following command:
robocopy z:\data\lookout e:\data\lookout /E /SAVE:E:\myCopier /QUIT
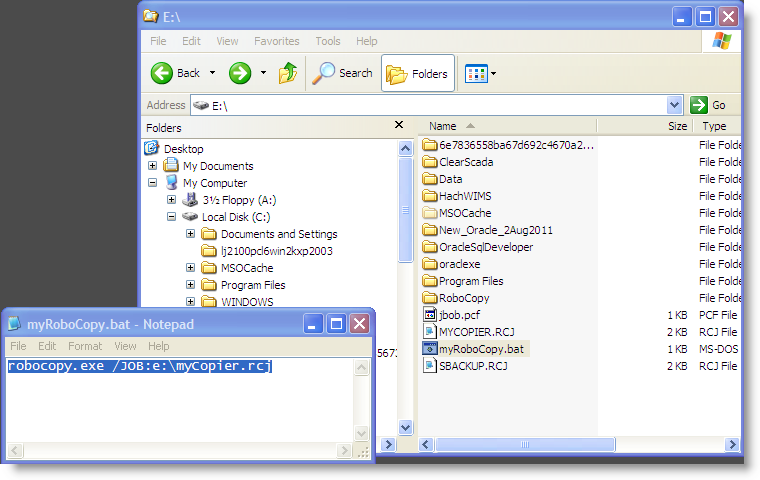
This created a file for our next step (file is MYCOPIER.RCJ on the root of the E: drive which is a local drive) - create a text file with a file extension of .BAT at the end, like myRoboCop.BAT. Edit this file and enter the exact command that you run in the command prompt to do the actual copy. In our example, we created a RCJ file and can just execute that file using the /JOB command. The file has the following line and looks like this:
robocopy.exe /JOB:e:\myCopier.rcj
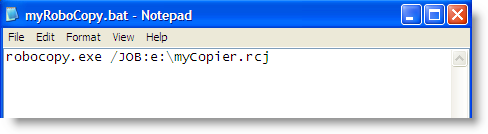
Then create a batch file (with .BAT file extension) to execute: robocopy.exe /JOB:e:\myCopier.rcj.
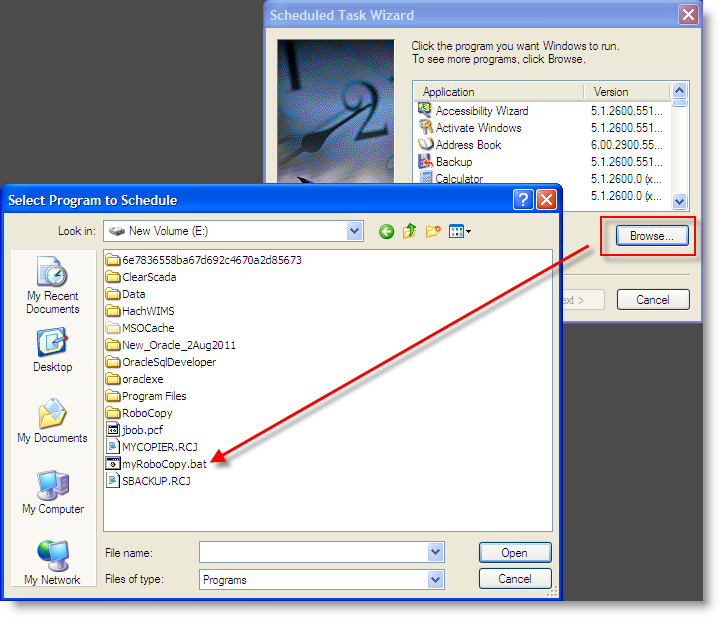
The next step is to create a Scheduled Tasks from the Windows Control Panel.
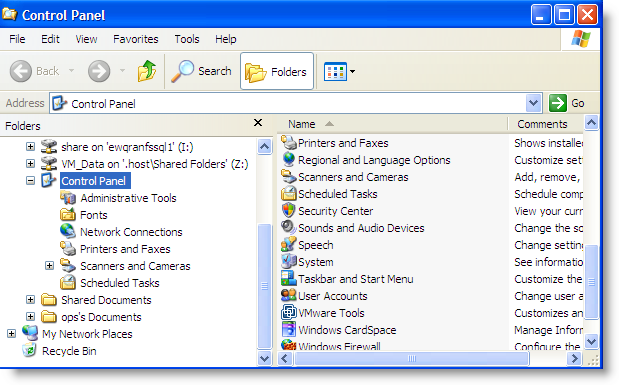
Click on the Add Scheduled Task and click the Next> button on the first screen. Clicked on the Browse button to locate the batch file (in our example that is e:\myRoboCopy.bat):

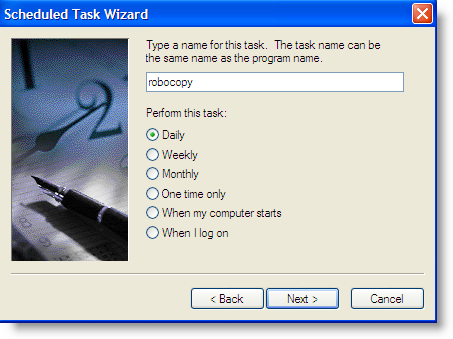
Select the frequency to run RoboCopy, we selected Daily.
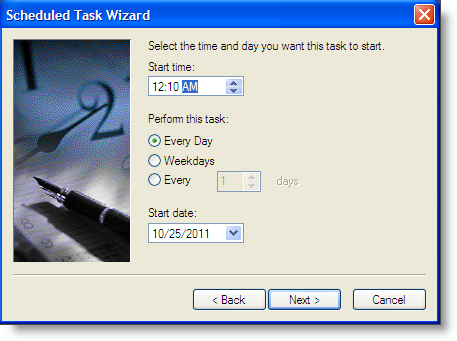
Select the time to run this task, we selected 12:10 AM, ten minutes after midnight, and Every Day.
Enter the user name and password for the account that will run this command. If using mapped drives, make sure the drive is mapped for this user account. Also, use a local account (for example; in our example it has '.\ops', the '.\' implies local system account as opposed to a network account).
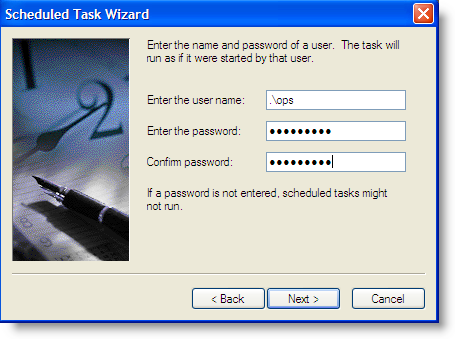
The last step for the basic setup is to just click Finish.
TESTING:
Test the scheduled task by right clicking on the scheduled task and selecting Run
Go check the source directory and the destination directory and see that it appears as you expected. If you used the /JOB option, you can modify your file to perform exactly as you want without altering the scheduled task. The best way to modify the file is to run the robocopy program from a command prompt with '/SAVE job_filename /QUIT' added. Just remember that the scheduled task expects a certain file in a specified location.