The Hach WIMS Direct Server-Side Interface to Generic SCADA CSV Files is very generic for the Hobo Data Logger. In our testing we created files with 2 header lines, 1 header line, and no header lines. As long as the configuration is set up properly, the interface worked perfectly. IMPORTANT NOTE: If you Launch before you Readout, there is a good chance you will loose previously logged data - always Readout first, then Launch.
If you have 2 or more Data Loggers, it is best to keep the data source files in separate folders but under one main folder. This article will contend with setting up the Hobo Data Logger, creating CSV files, and the file and folder structure used to accomodate multiple loggers.
Open up HOBOware, in our example we are using HOBOware Lite. Click File -> Preferences.
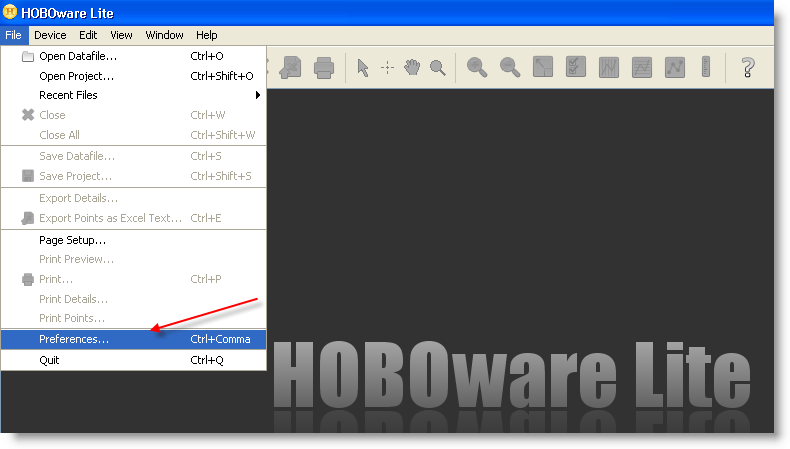
Under Preferences, click General and open Export Settings. The first screen below shows our configuration. There are two options that MUST be as shown, the rest are left up to you.
- Export table data column spearator: must be Comma (,)
- Column header: [ ] No quotes or commas in headings, properties in parentheses MUST be UNCHECKED.
The following is the bottom half of the Export Settings. We show the default settings that we used, but you can change these to fit your needs. Where it says Select these options, should be selected as shown, but not mandatory. This will allow HOBOware to create one CSV file for you. You can use multi-file export if you wish.
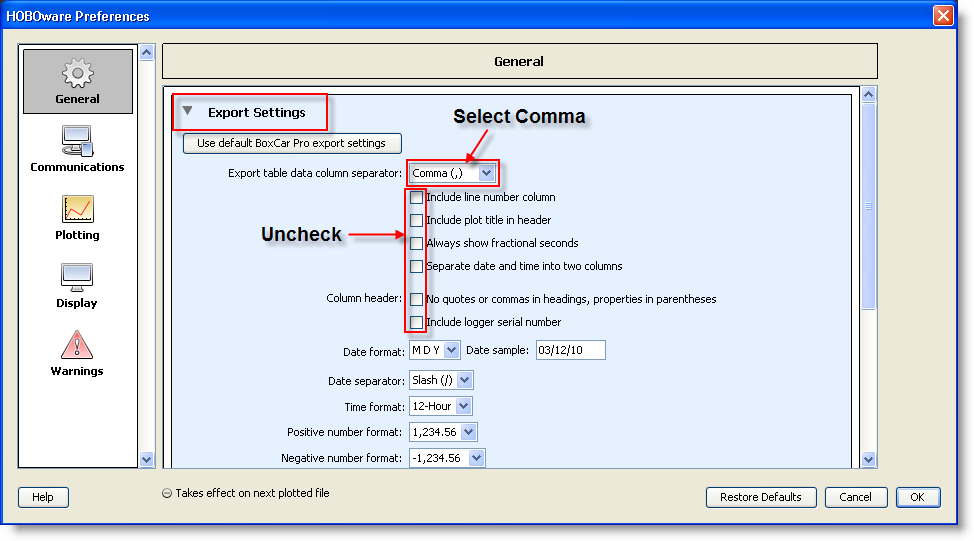
When the preferences are set, we are ready to Launch the data logger, so click Device -> Launch and the following screen will appear.
The important thing is to keep the same configuration for all CSV files and for all data loggers. Onset makes this easy by providing the capability to Load Previous Configuration.
Following is an excerpt from Onset documentation on HOBO Data Loagger:
To always use the settings from the logger's memory, you can return to the default setting by going to Preferences > General > Launch Time-Saving Options and choose Fill launch window with contents of Current logger.
Notice in the middle of the screen the title: Logging Duration. This is how long the logger can continue logging data for you until you need to Readout data, based on your current configuration.
After a day or two you may want to create a CSV file with HOBOware, click on Device and select Readout.
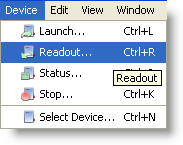
You will be told the logger is running and asked what to do. The Onset documentation for HOBOware recommends selecting the Don't Stop option. If you stop the logger, the logger stops collecting data and you will have to Launch it again later on, which means you loose data between when you stopped it and when you re-Launch it.
Go through the options and select whatever you need to. The following screen will eventually appear and this means you also have a CSV file with this data.
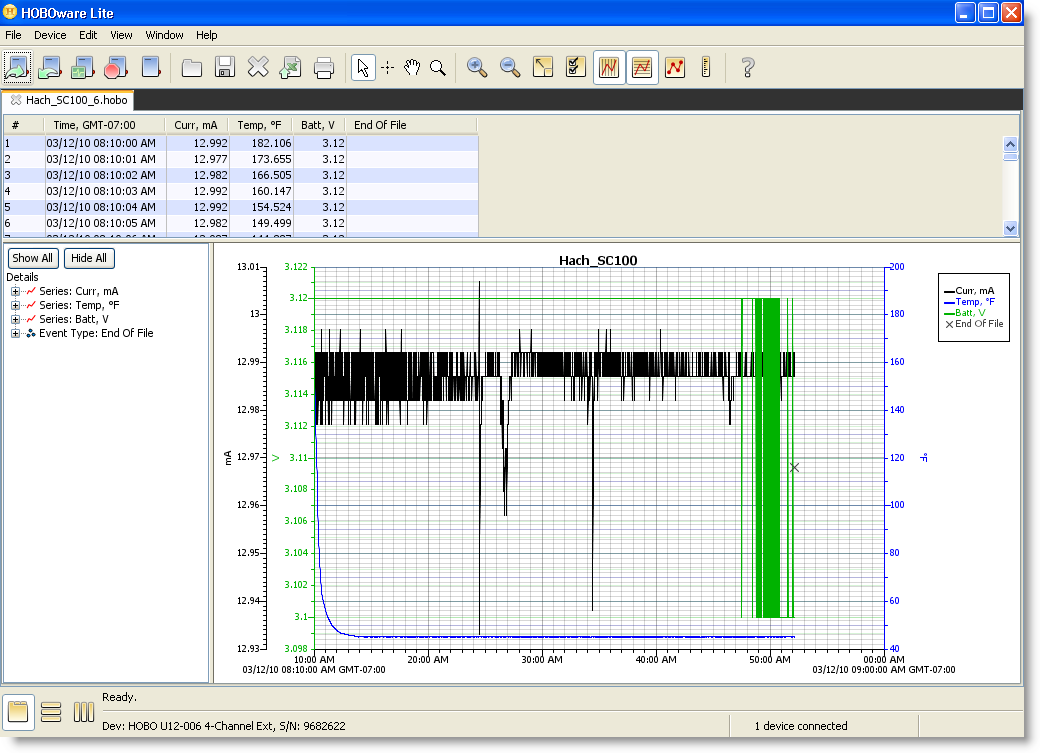
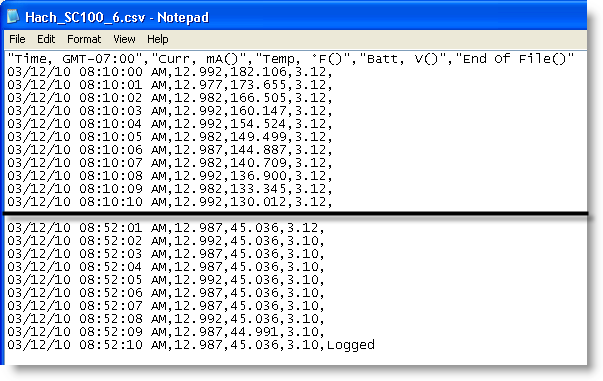
Here is an example of a CSV data file:
In our example we have 4 data loggers, and we just want the first data point on the logger - no matter how many devices are connected, we just know the first channel is the instrument we need a reading imported into Hach WIMS (this is just to simplify the example).
Below is our folder structure:
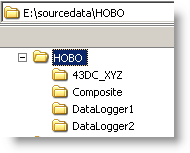
We have 4 data loggers labelled 43DC_XYZ, Composite, DataLogger1, and DataLogger2. Our base folder is E:\sourcedata\HOBO (shown at the top of the picture).
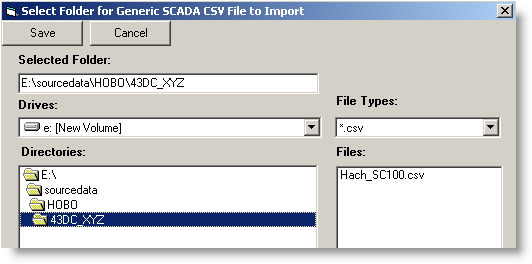
Run the interface and select Configuration -> Source Configuration, then click the elipse button [...] next to Import Folder Location.
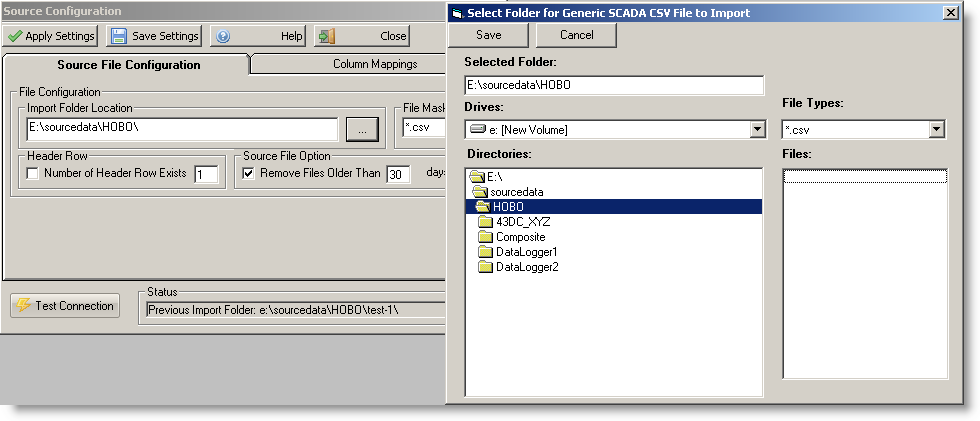
This is the setting we want, but we have a problem coming up. In order to define Column Mapping, we need a sample file. All the files need to be in the same format, but not necessarily contain the same tag names and data points. We can select any one of the subfolders to actually see a sample data file.
Click Save for now and then click on the Column Mapping tab. Click on whehter date and time will be in one or two separate columns, and then click elipse button [...] for DATE.
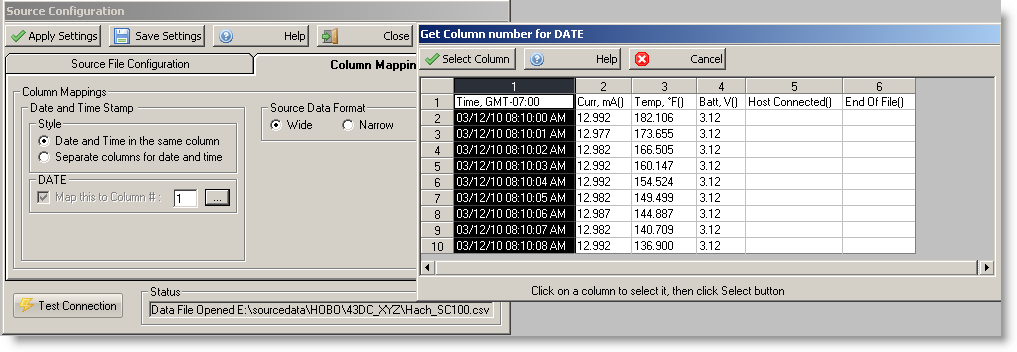
In our example we have both date and time in one column, we select the top option and then click elipse button. The first column is our date and time, so we click that column and then click Select Column button.
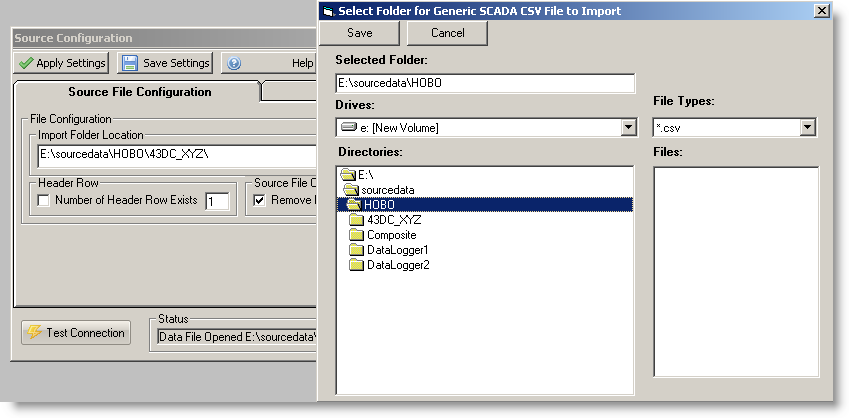
Go back to the Source File Configuration. We aren't done yet. We need to change the Import Folder Location to our base location of E:\sourcedata\HOBO\, and then click Save. Next we click Save Settings and we are done with the interface part.
Run the Hach WIMS client program and select menu option System Setup -> Edit/View Variables. Either navigate to a variable set up for the Hobo Data Logger or create a variable for this, we want to look at the Interface tab. Once you go through the basics in Supported Variable Configuration, you can set up a TAG. There are two ways to do this. First we can use the column name, and the other is to use the column number. We will look at both.
In order to specify a tag name, enter the subfolder, two appersands, and the tag name. In our base folder we had 43DC_XYZ for a folder and under that is a file that contains Curr, mA(). So our TAG will be 43DC_XYZ@@Curr, mA() as shown below.
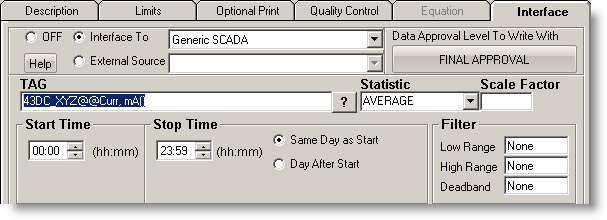
That will always be accurate as long as the tag name stays the same, even if it moves to a different channel or row. If you know that is not going to happen, an easier way to define the tag name is using the column number. In the data, the current, milli amp is in column 2, so our TAG can be 43DC_XYZ@@2.
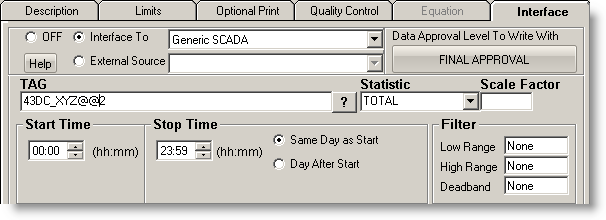
So if all my data points are the first channel, or column 2, I can copy this variable and just change the subfolder name. For example to get the first channel in Composite I would change the TAG to Composite@@2.
Now we are ready to import data.