Using the CSQL2XML utility to convert Cimplicity SQL data into OPSDATAXML files.
This utility will connect to a Cimplicity MS SQL database and convert the data into a format (OPSDATAXML) that can be used by HACH WIMS. The Hach WIMS Direct Server-Side Interface to GE Fanuc FIX / iFIX HMI will then import data in these files into WIMS.
SETTINGS - General Settings - Configure basic settings for the utility
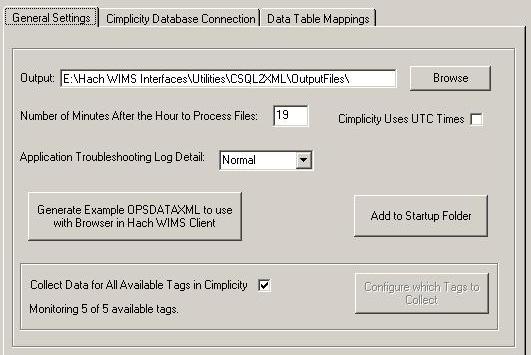
OUTUT: The location where you want the converted OPSDATAXML files to be stored. These files will need to be saved to a folder that the Hach WIMS Direct Server-Side Interface to GE Fanuc FIX / iFIX HMI has access to.
Minutes After the Hour: The CSQL2XML utility will process Cimplicity SQL data every hour. This field tells the program how many minutes after the hour to process the data.
Application Troubleshooting Log Detail: Used to specifiy how much aplication runtime information to log. The higher the log level the more detail that will be logged. This information will let you know how the program is performing and alert to issues that may need to be addressed.
Cimplicity Uses UTC Times: The CSQL2XML utility will convert the data to UTC Times unless the data already uses UTC Times. Only check this if you are sure that your Cimplicity is using UTC Times. UTC stands for Universal Time Coordinated. It is a coordinated time scale, maintained by the Bureau International des Poids et Mesures (BIPM). It is also known a "Z time" or "Zulu Time".
Generate Example OPSDATAXML to use with Browser in Hach WIMS Client: This button launches a form that lets you save an example OPSDATAXML file to be used by the Browser in the Hach WIMS Client. This file is needed so the browser knows what tags are available. If you are collecting data on all available tags then all tags will be saved to the file. If you are filtering the tags to collect data on, then only the filtered tags will be saved to the file. If changes were made to the list of tags to collect, those changes should be saved first before attempting to create this file.
Add to Startup Folder: Click this button to copy a shortcut to the Windows Startup folder so that the CSQL2XML utility will automatically start when Windows starts.
Collect Data for All Available Tags in Cimplicity: When this is checked, data for all available tags wil be collected. When it is unchecked, the Configure which Tags to Collect button will be enabled.
Configure which Tags to Collect: This button launches a form that allows you to pick and choose which tags you want to collect data for.
Monitoring Tag Counts: The program keeps track of how many tags you are currently collecting data for and the total possible tags that are available.
SETTINGS - Cimplicity Database Connection - Configure the connection to your Cimplicity database
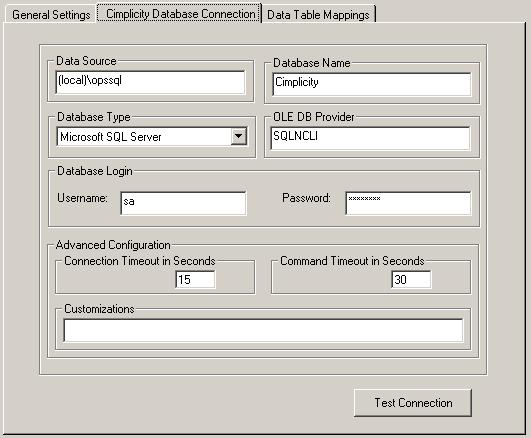
Data Source: This field specifies, in loose terms, the "Database/Datasource server name" where your Cimplicity system is configured to store data. For MS SQL this is in the form of host\sql_instance_name.
Database Name: This is the name of the database that contains the Cimplicity data.
Database Type: Currently only MS SQL Server is supported
OLE DB Provider: This specifies which "database driver" the interface will use when connecting to the Cimplicity database. If connecting to MS SQL 2005 or later, use the native client to connect. Specify SQLNCLI as the provider. NOTE: You will need to have the Microsoft SQL Native Client installed for this to work. If connecting to MS SQL 2000, specify SQLOLEDB as the provider.
Username: The username you want to use to connect to the Cimplicity database. This user must have the rights to view the database tables that contain the data.
Password: The password you use to login into the database.
Connection Timeout in Seconds: How many seconds the program should wait when establishing a connection to the Cimplicity database before aborting.
Command Timeoutin Seconds: Specifies how many seconds the program should wait for a query to complete before aborting the operation.
WARNING: Large values for these two settings can cause the program to not respond for a long period of time! Do NOT use 0 unless you know what you are doing - it will cause the program to wait indefinitely, and if your database server is down, the only way to cancel the operation is to forcefully quit the program.
Customizations: This should be left empty unless you were told otherwise by a Hach Support Engineer or you know what you are doing.
Test Connection: Test to see if the connection settings are valid and the utility is able to connect to Cimplicity database. This will NOT Apply or Save the settings.
SETTINGS - Data Table Mappings - This is where you tell the utility which tables contain the Cimplicity data. The utility needs to know which tables to monitor, the name of the column that contains the Timestamp and the name of the columns that contain data. By default it is assumed that the first column is the Timestamp and all the other columns contain data. Note: The contents of the second and third column change as you click on the Table name in the first column. That is, column two and three contain the contents of the table that is selected in the first column.
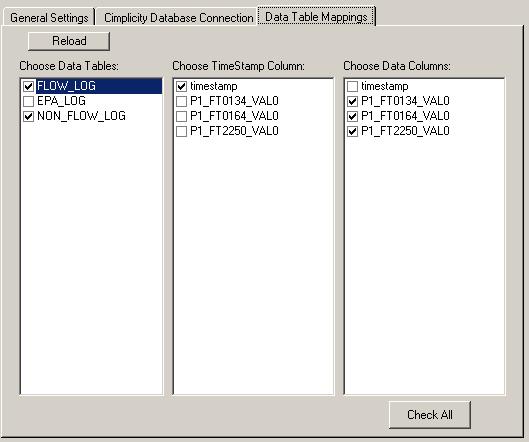
Data Tables: Click on the list of tables that contain data you want the utility to monitor. When you select a table the other two columns are populated with the contents of that table. You can select one or more tables.
TimeStamp Column: The utility needs to know which column in the database contains the timestamp. By default the first column will be assumed to contain the timestamp. One, and only one, column must be checked.
Data Column: The utility needs to know which columns contain data that you want to monitor. By default every column but the first will be assumed to contain data. At least one column must be checked.
Reload: If changes were made to the database or the database connection, click this button to refresh the data tables. If no tables are listed after clicking the button check your database connection and confirm that the username chosen has permission to view the data tables.
Check All: Checks all the items in the data column except the first one.
SETTINGS - GENERATE EXAMPLE OPSDATAXML TO USE WTH BROWSER IN HACH WIMS CLIENT - Use this form to save an example OPSDATAXML file to be used by the Browser in Hach WIMS Client.
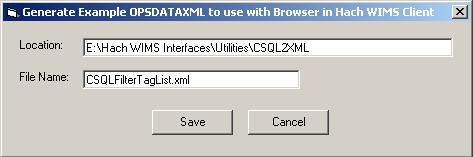
Location: The folder path to save the file to.
File Name: The name you want to give the file.
SETTINGS - SELECT TAGS TO COLLECT DATA FOR - Use this form to select the tags that you want to collect data for. This is different than Data Table Mappings of the Settings form. That form was telling the Utility which tables and columns contain data. Basically, all the data that is available to the Utility. This form is telling the Utility which of those columns/tags you want to collect data from. You must configure the Data Table Mappings before using this form.

All Available Tags: This is a list of all the tags that are available in the system that we can collect data for.
Filtered Tag List: This is the list of tags that we will collect data for.
Search Boxes: The search boxes allow you to search the list of tags for a particular string. The search will start from the currently selected tag (or the top if nothing is selected) so you can continue to press the search button to find the next match.
OK: Closes the Window. Changes will not be saved or applied until the Save and Apply Settings button is clicked on in the Settings form.
SETTINGS - Toolbar

Apply Settings: Makes the changes in memory but doesn't save them to disk. You can apply your changes, test them and if you are satisfied with the results you can then save your changes.
Save Changes: Makes the changes in memory and saves them to the disk.
Help: Brings up this document.
Close: Closes the Settings form.
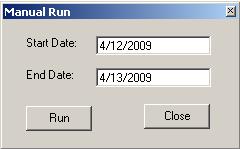
MANUAL RUN - Use this form to process data between the date range specified.
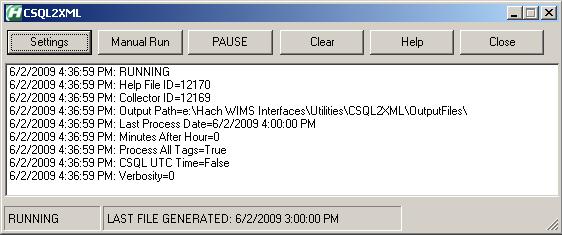
RUN MODE - The utility can be in 1 of 3 states.
1) Running - This is the default state and indicates that the utility is running and will process data
2) Manual Mode - This is the state of the utility if you specified the dates to process data
3) Paused Mode - This state indicates that the utility is paused and will not process data
CLEAR - Clears the log screen
CLOSE - Sends the program to the task tray. The program will remain running. To exit out of the program completely you will have to right click the icon in the task tray and choose exit.