|
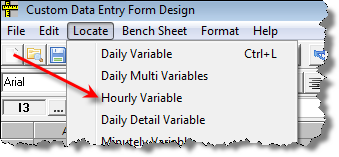
Custom Data Entry Design - Used to create entry cells for entry into an hourly variable. |
 |
 |
USING:
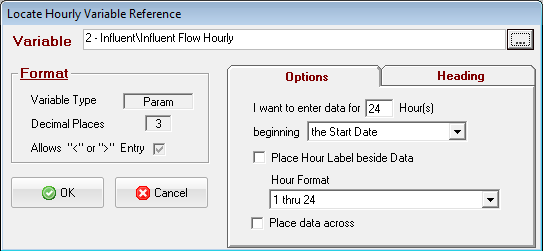
Select the variable you wish to locate. Set the number of values you want ot enter data for (default of 24 allows 1 entry for every hour of the day). Click OK and the variable will be placed into the currently selected cell.
The cells for which variable references are associated are formatted according to the current settings for the selected variable in System Setup, Add/Edit Variables. The number of decimal places, the type of variable and whether or not to accept "<", ">", and "ND" entries are all fields which can change format settings of a cell that stores data into a variable. Each time a form is loaded for data entry, these settings are changed based on their current values.
FIELDS:
Variable: Select the variable to be placed on the form.
Variable Type: Displays the Variable Type of the selected variable.
Decimal Places: Displays the current setting for the number of decimal places for the selected variable.
Allows "<" or " >" Entry: Displays a check mark for variables that are setup for Minimum Detection Limits. Click here for information on MDLs.

I want to enter data for ____ values: Enter the number of values to be entered. Value will default to the number of values (slots) for the selected variable (i.e. 24 for hourly variables)
Place Date Beside Data: Check to place the date/time next to the data entry cell.
Date Format: Sets the format for the placed date/time.
Place Data Across: Locates the entry cells across the form instead of the default down the form.

The Heading is the text which is placed beside at the top of a column when a variable is placed on the form.
Variable Number: Check to display the Variable Number.
Variable Name: The Variable Name as specified in System Setup, Edit/View Variables.
Location: The Location the variable is assigned to.
Location Path: The entire path of the Location the variable is assigned to (e.g. Aeration\Tank #1, Filter Gallery\Filter #1)
Units: Check to display the variable's Units.
User Defined 1: Check to display the variable's User Defined 1 field. WIMS will display the actual name of the User Defined 1 field (i.e. what is was renamed to). See the User Defined tab for information on user defined fields.
User Defined 2: Check to display the variable's User Defined 2 field. WIMS will display the actual name of the User Defined 2 field (i.e. what is was renamed to). See the User Defined tab for information on user defined fields.
BUTTONS:
 |
Places the field or fields on the form. The fields will be placed in the upper left hand corner of the form and be pre-selected so that they may be moved to their desired location.Click Here to learn more about moving fields on a Custom Data Entry form. |
 |
Cancels the placement of a variable field and returns to the design screen. |