|
This article will cover setting up DCOM for OPC interfaces to work over networks. This article was written for Windows XP SP2 users but it should also be relevant for Windows Vista users.
Configuring Windows Firewall
If there is a firewall between the two computers, simply add the interface EXE, OPCENUM.exe and any other OPC Client and OPC Servers that you want to communicate with to the exception list of the firewall.
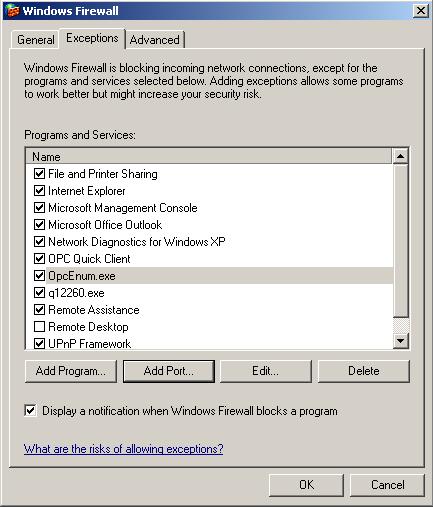
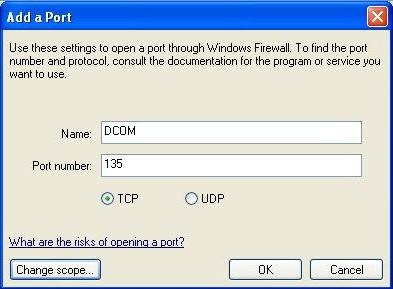
Add Port named DCOM, port number 135, and TCP type to the exception list:
(Excerpt from OPC Foundation paper: Using OPC via DCOM with Microsoft Windows XP Service Pack 2)
Configuring DCOM
DCOM has settings for:
- Machine Default
- Each Server
Configuring DCOM Machine Default
Follow these steps to configure the DCOM machine default settings for OPC
Communications using Windows XP Service Pack 2:
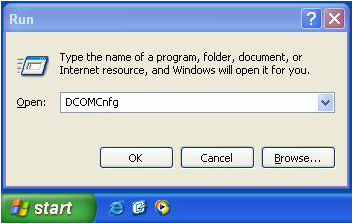
1. Go to Run and type DCOMCnfg and click on OK
2. Click on Component Services under the Console Root to expand it.
3. Click on Computers under Component Services to expand it.
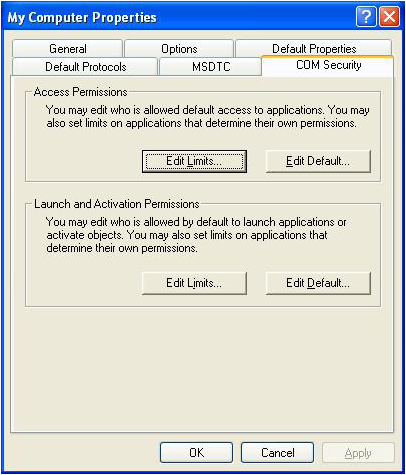
4. Right click on My Computer in the pane on the right and select Properties:

5. Go to the COM Security tab and note these are the four permission configurations that we will have to edit:
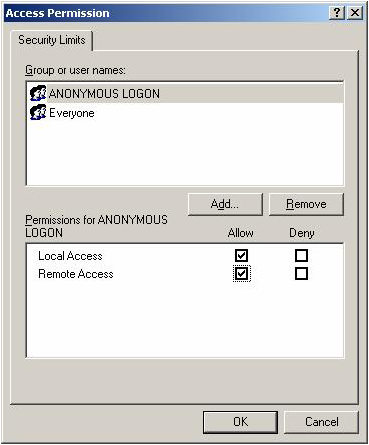
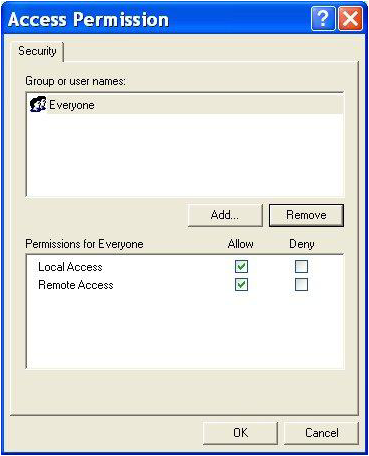
6. Click Edit Limits button to edit Access Permissions to change the access limits.
7. Check the Remote Access box for ANONYMOUS LGOIN and click OK
NOTE: This setting is necessary for the OPCENUM.EXE to function. Also, some OPC Servers and Clients that set their DCOM "Authentication Level' to 'None' and require this setting to allow for an anonymous connection.
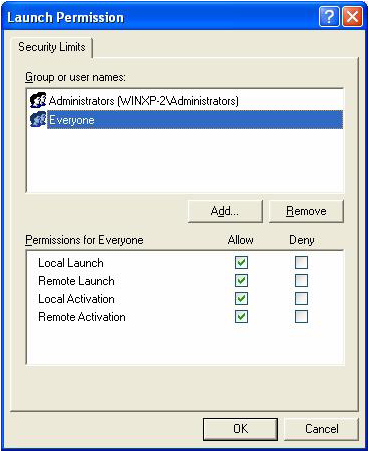
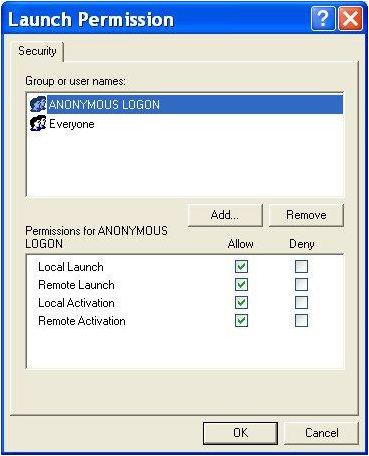
8. Click Edit Limits button to edit Launch and Activation Permissions to change the launch and activation limits.
9. Check the Remote Launch box for Everyone and click OK
NOTE: Since Everyone includes all authenticated users, it is oftern desireable to add these permissions to a smaller subset of users in bigger plants with many users. One suggested way to accomplish this is to create a group named "OPC Users" and add all user accounts to this group that need to execute any OPC Server or Client application. Then substitute "OPC Users" everhwere that Everyone appears in the following configuration dialogs.
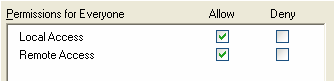
10. Click Edit Default ... button to edit Access Permissions default permissions.
11. For each user/group that will need access to OPC communication, make sure that both the Local Access and Remote Access checkboxes are checked under Allow. Click OK.
12. Click Edit Default ... button to edit Launch and Activation Permissions default permissions.
13. For each user/group that will need access to OPC communication, make sure that both Local and Remote checkboxes are checked under Allow. Click OK.
Configuring DCOM Each Server
Follow these steps to configure DCOM for a specific COM server for OPC.
1. Go to Start -> Run and type DCOMCnfg and click on OK.

2. Click on Component Services under the Console Root to expand it.
3. Click on Computers under Component Services to expand it.
4. Right click on My Computer in the pane on the right and select Properties
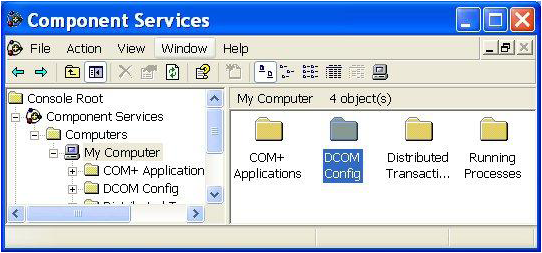
5. Double Click DCOM Config
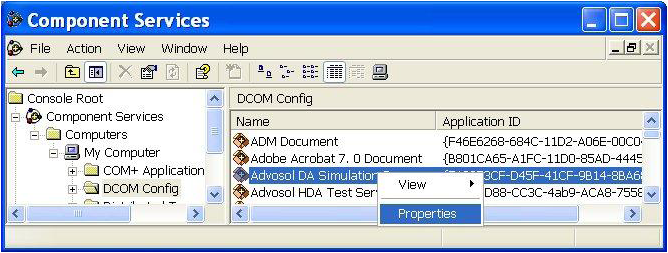
6. Select the OPC Server, right click the selection and then click Properties
7. In the server property page select the Security tab
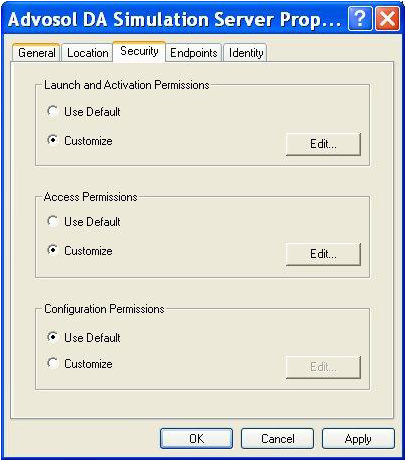
8. Edit the server permissions settings by selecting Customize and click the Edit button.
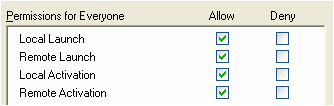
9. Edit the Launch and Activation Permissions
For each user/group that participates in OPC communication (e.g. .OPC Users.), make sure that both the Local Allow and Remote Allow checkboxes are both checked.
NOTE: This setting is necessary for OPCEnum.exe to function and for some OPC Servers and Clients that set their DCOM 'Authentication Level' to 'None' in order to allow anonymous connections.
NOTE: Since Everyone includes all authenticated users, it is often desirable to add these permissions to a smaller subset of users. One suggested way to accomplish this is to create a group named .OPC Users. and add all user accounts to this group that will execute any OPC Server or Client. Then substitute "OPC Users" everywhere that Everyone appears in these configuration dialogs.
10. Edit the Access Permissions
For each user/group that participates in OPC communication (e.g. .OPC Users.), make sure that both Local and Remote pairs of checkboxes are checked.
NOTE: The Launch and Access users are not necessarily the same, even for a single client application. Windows uses the thread security token for the launch/activation but the process token for the access. The two security tokens may be different.
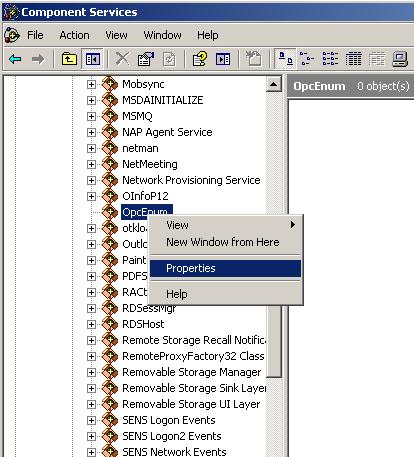
Configuring OpcEnum
OpcEnum is a program that scans your registry for a list of OPC Servers on your computer. Similar to how you just configured the OPC Server you also have to configure OpcEnum. Right click OpcEnum from the DCOM list and choose properties:
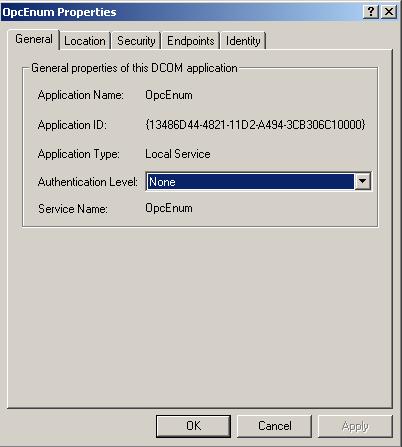
Configure the OpcEnum settings according to the screens below:
General tab:
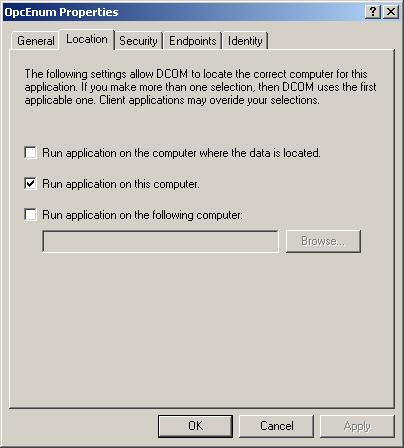
Location tab - select Run application on this computer:
Security tab - Configuration Permissions - Customize:
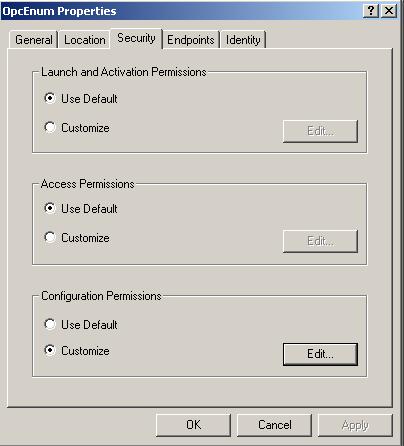
For Configuration Permissions, choose Customize and click the Edit button. Add the user "Everyone" and make sure that it has Full Control rights. You may also want to add the Users Interactive, Network and System and also give them full control.
Other Considerations
1) Enable File Sharing on both computers. Make sure the two computers can share files with each other.
2) Have the same login/password combination on both computers
3) Make sure the computers are part of the same domain/workgroup
4) Make sure OpcEnum is running
5) Disable the firewall. If this clears up the problem turn the firewall back on and add the appropriate programs and ports to the exception list.
|