OVERVIEW:
When training OPS SQL to serveral users it is recommended that they each have their own copy of the tutorial database. This allows users to not get in each other's way during training (i.e. only one user can create a variable in a database at one time).
APPLIES TO:
NOTE: You will need OPS SQL Super users priviledges and MS SQL 2005 DBA rights. You MUST be familar with OPS SQL and MS SQL Server Management Studio.
1. Download the tutorial database. See Downloading and Attaching MS SQL 2005 databases for more information.
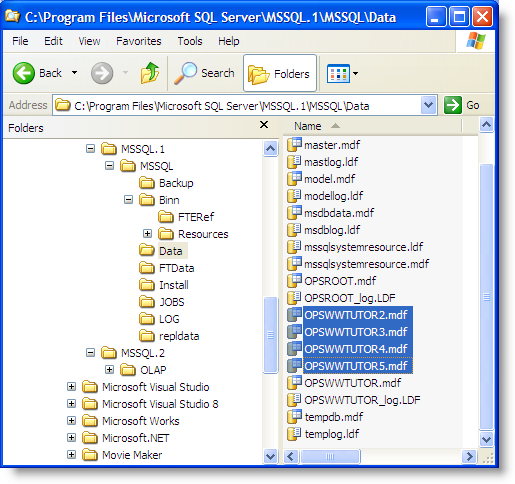
2. Copy and rename the extracted MDF file for the number of databases you need to create. In this example, the OPSWWTUTOR.mdf is already in use so I renamed OPSWWTUTOR.MDF to OPSWWTUTOR2.MDF and copied it to the MS SQL 2005 data folder (typically C:\Program Files\Microsoft SQL Server\MSSQL.1\MSSQL\Data) and copied the OPSWWTUTOR2.MDF three more times to make the databases I need.
3. Now we need to attach the databases using SQL Server Management Studio. You will need to login to the Management Studio with DBA privledges. Right Click on Databases and click Attach:
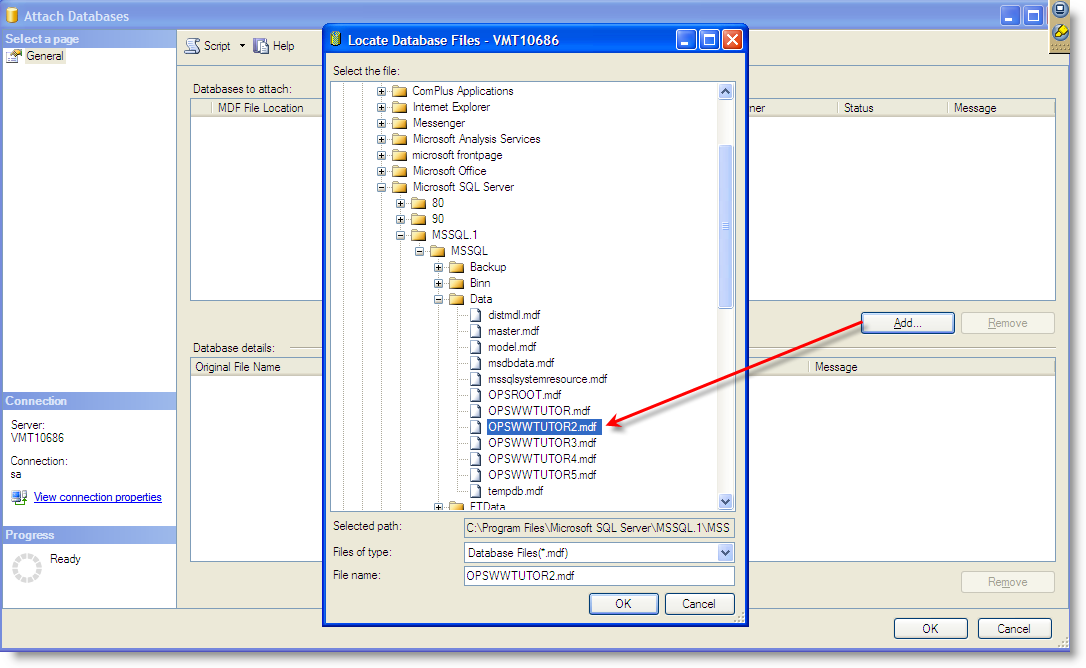
4. Remove the OPSWWTUTOR_log.LDF (this is the transaction log) since it is not included in the Zip. MS SQL Server will automatically create a new transaction log. Click OK and the database will be attached.

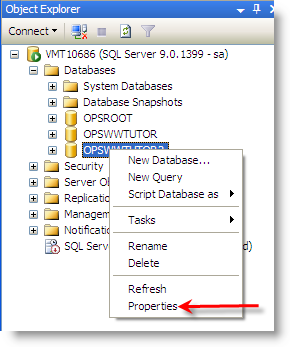
5. Right Click on the newly attached database and go to Properties:
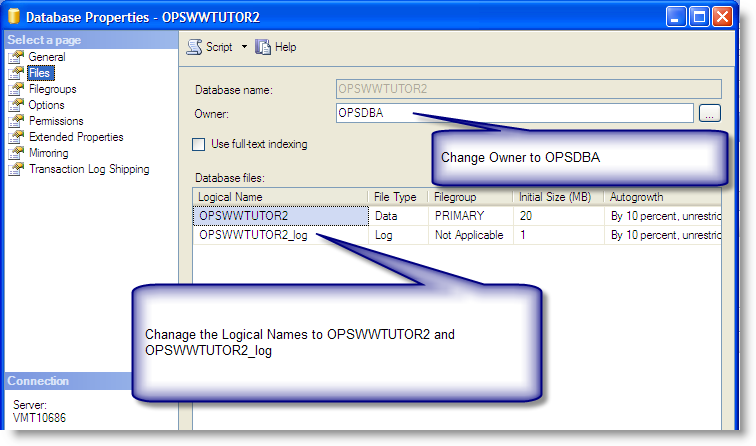
6. Click on Files, and change the Owner to OPSDBA and change the Logical Names to OPSWWTUTOR2...
7. Repeat Steps 3 through 6 for each database.
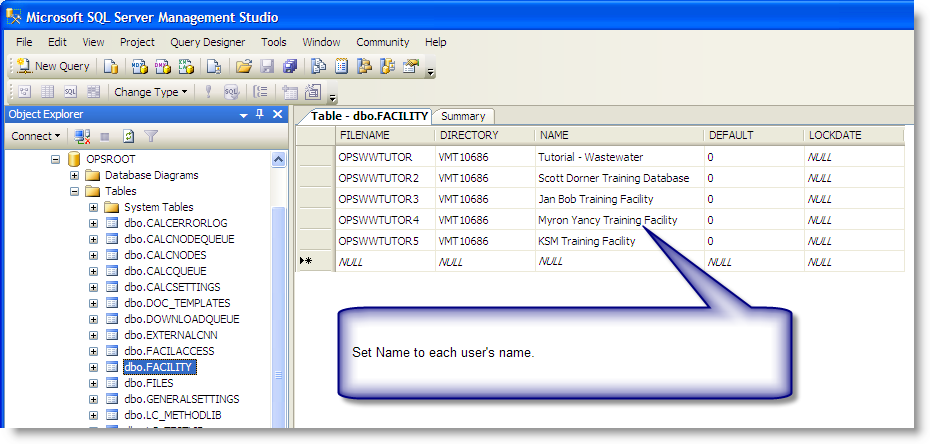
8. You must now make an entries in the OPSROOT.FACILITY table to tell OPS SQL the databases are availiable.. Right Click on the FACILITY table and go to Open Table and create records as follows:
9. Log into one of the databases to make sure they are the proper database version.
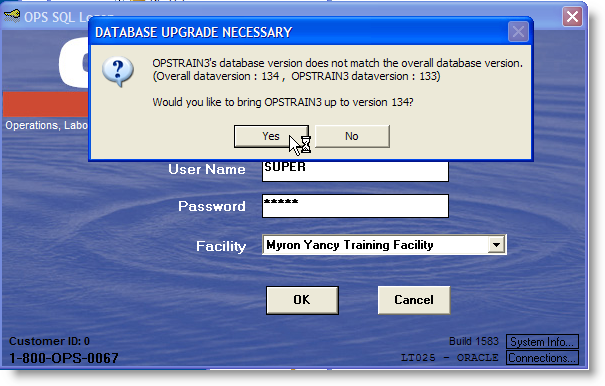
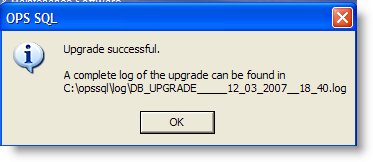
Click Yes to perform the upgrade of the database and follow the instructions on the screen. When the database upgrade is complete you will get the following message.
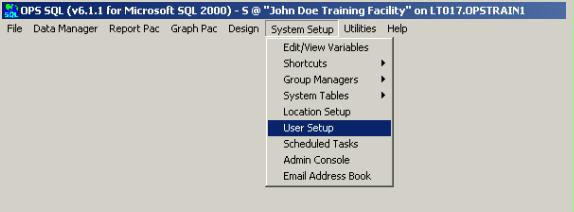
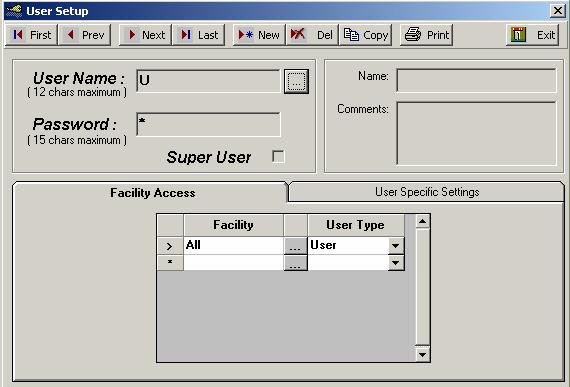
10. Go to User Setup
11. It will ask you to confirm your password. Do that. You’ll arrive at this screen:
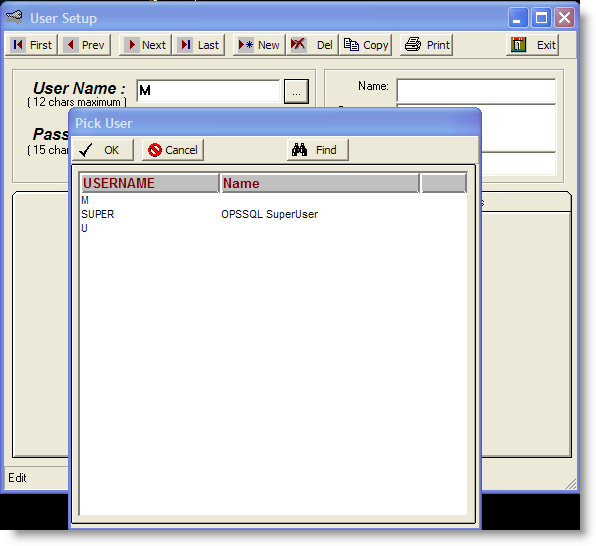
12. Click the browse button (…) and navigate to user MWY (Mryon Yancy).
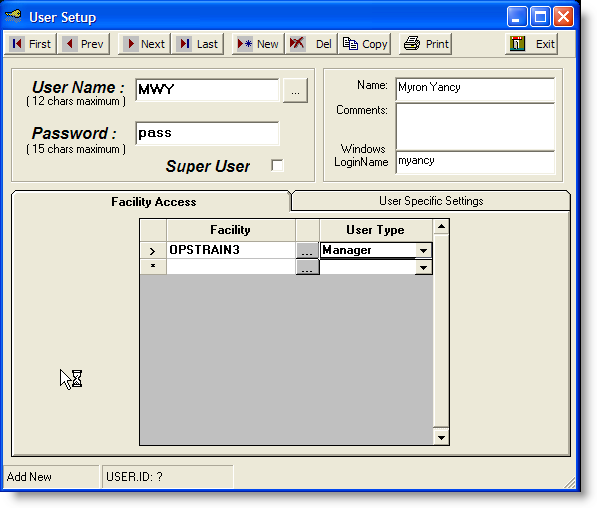
13. If user doesn’t exit, create a new user with desired username.
14. Make sure you give the user right to his desired database.
15. Repeat steps 12-14 for all your users.
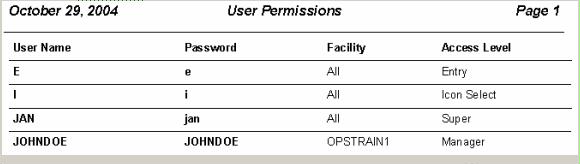
15. If you click the PRINT button now, you can output usernames and their respective passwords. This will come in handy during upcoming steps.
16. Close User Setup.
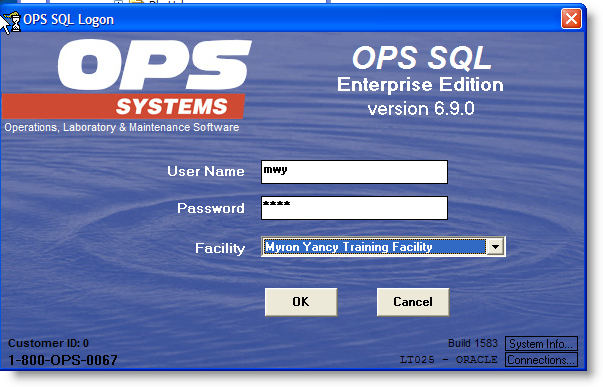
17. In Main menu of OPSSQL, go to File/Open Facility via Login. You will be back to OPS SQL login screen
18. You want to login as JOHNDOE and pick “John Doe Training Facility” from facility list.
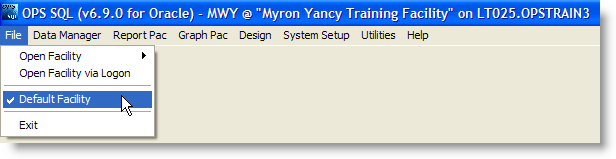
19. Once inside OPSSQL, Go to File and check the Default Facility” menu item
20. Repeat steps 17-19 for the rest of your users.